


{Celebrate} Pirate Themed Birthday Party
June 12, 2011 in All Posts, Celebrate

 Ahoy there, Mateys!
You’ve read about my inspiration for Sam’s pirate themed first birthday party and how to make your own pirate party invitation - now here’s how our party turned out and some ideas for your buccaneer bash.
The Pirate Ship

From the second I came up with the idea for the pirate theme, I became obsessed with building a life-sized pirate ship for our partygoers to play in.
If you’ve been following on Facebook, you know that I even resorted to the extreme of dumpster diving in the parking lot of Michael’s for cardboard boxes.
After harassing every shipping department from Sears to Safeway for refrigerator or washer/dryer sized boxes, I ended up purchasing 5 grand wardrobe boxes from U-Haul. The plans I downloaded from Mr. McGroovy called for 7 boxes, but it was hassle enough for me to maneuver the five I had, so I figured we could make do and be creative about it.
The $23 I spent on the plans and Mr. McGroovy’s rivet project kit were so worth it. The plans were easy to follow and the rivets made building and taking down the ship - literally - a snap. The great thing about the rivets is that you can re-use and rebuild your project over and over again.
We cut the cardboard pieces for the ship walls at home two days before the party and decorated the cardboard cutouts the evening before and the morning of the party when Hubby and Uncle B set up the ship at the park.
Jane had a blast painting and setting up the ship:


Hubby and Uncle B (dressed as a pirate) finished building the ship just as the guests began to arrive:


We spray painted the outer hull of the ship with black chalkboard paint with the idea that the kids could draw on the ship as a party activity. For the inside, we kept it bright and cheery in playful preschool colors. We also added some chalkboard contact paper to a few inside walls for the children to draw on.

 The finished ship:

 The net and bamboo pole masts with pirate flags - Grandma’s ideas - were the finishing touches. I couldn’t find any starfish or other sea creatures to attach to the net, so we ended up using those toy animals that soak in water for 72 hours and grow 6 times their original size. Of course, after Pirates of the Caribbean: On Stranger Tides was released, pirate party paraphernalia showed up everywhere!
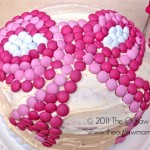
The Treasure Chest Cake
 What I really wanted to do was this amazing cake by The Willow Blog. But since we designed, created and decorated the cake the night before the party, we changed the concept to an old sea-weathered treasure chest. I say “we,” because this cake was truly a family effort with Grandma, Granny, Hubby, and Uncle B all involved into the wee hours of the evening.
Here’s how we did it:
Construction
After stacking two rectangles of sheet cake, I did a crumb coat using my favorite buttercream frosting. Then Grandma fashioned the top lid of the chest with a curved piece of cardboard and not-to-be-overlooked outstanding architectural and design direction from Hubby and Uncle B. We covered the lid with aluminum foil and placed a few squares of leftover sheet cake under the lid at the back of the rectangular base to prop it up. Another layer of buttercream frosting over the lid and back of the cake sealed the lid to the base.
Decoration
Using Wilton gel icing color in brown, I mixed a dark brown frosting to cover the entire base of the cake. To cover the lid, I pressed on dark brown fondant, and then placed light brown fondant around the base for a decorative trim that would help outline the shape of the treasure chest. Silver, gold and white Wilton shimmer dust added a pearlized, dusty effect proper for a glistening treasure chest washed ashore.
The fun part came next: I rolled several small fondant balls of varying sizes to make pearls and then covered them with pink Wilton pearl dust and the white Wilton shimmer dust. If you’re wondering about the difference between pearl and shimmer dust, the pearl dust is much sparklier - so of course I preferred it! I placed the glistening pearls in strands along the two sides of the chest so they would appear to be spilling out. Note: the homemade marshmallow fondant from The Frosted Cake and Cookie that I was so excited to work with didn’t work out so I opted for pre-made fondant. (I might try it again because of the rave reviews, including praise from SugarBelle, and because it was the most fun to mold and shape).
Finally, I stuffed the cake with as many chocolate gold coins (correctly pointed out to me as “doubloons” by Jane) as I could fit to achieve a stuffed, overflowing look.

 We carried the cake to the park the next morning on a homemade cake board (cardboard covered with aluminum foil) and decorated it during the party. To create the beach, I poured light brown sugar around the sides of the cake and added some blue frosting for a bit of “ocean.” Then I added a sea of gold coins in the remaining space in front of the bit of ocean and on the sand.

 We ended up never cutting the cake at the party! (See The Birthday Boy below). But the kids were treated to cupcakes decorated with buttercream frosting, M&Ms and cute pirate cupcake toppers from Meri Meri.
The Fare
We offered a pared down version of the menu for Jane’s Special Agent Oso themed birthday party: bagels, cream cheese coffee and juice. We also offered personal organic watermelons, carved out with a melon baller and re-filled with watermelon balls, strawberries and grapes.

Inspired by all the beautiful dessert tables showcased around the blogosphere lately, we topped the tables with glass containers filled with rainbow Goldfish crackers, black and red M&Ms, Swedish Fish and RedVines to go along with the black and red pirate theme.

 {What I wouldn’t give for a beautiful “blog worthy” shot of a lineup of our yummy containers!}
These Swedish Fish in blue jello technically were edible, but we just used them as decoration.
 We followed Chica and Jo’s advice on mixing the blue Jello with clear gelatin, which worked, but the “water” was still a bit dark. If you’re going to make these, be aware that the Swedish Fish will blow up into Swedish whales if you make them too far in advance!
The Favors
 Jane helped make these jewel encrusted treasure chests out of styrofoam boxes we picked up for pennies at a nearby pharmacy’s going out of business sale:


 We simply painted the chests and then glued on jewels. A word of advice: don’t use Gorilla Glue! I had it on hand and was too lazy to search for our other kid safe glue and it foams and poofs up, which makes for a tight, but funny looking, bond.
We had planned to put foam pirate swords (similar to this), bubble wands and pirate teddy bears in the decorated chests for our toddler guests to find on a treasure hunt, but you know toddlers . . . the second they saw the treasure there was no keeping them away! It was much better this way, though - the kids enjoyed sword fights and blowing bubbles from the get go.

Jane also made these great homemade telescopes that we passed out as another pirate prop to play with.
We planned to give out these little pirate booty bags with sticker, chocolate coin and temporary tattoo loot that Granny put together, but never got around to it:

The Birthday Boy
 Did Sam enjoy his party, you ask? So much so that he snoozed under the trees.
Since he was sleeping during the party, we took the uncut treasure chest cake home and saved it for a celebration at home later the next evening.

Hope your pirate party turns out to be a swashbuckling success!
![]()
Parents and friends: for more ideas, activities, and inspiration for #RaisingThinkingKids, click on an icon below to join us on Facebook, Pinterest, Google+ and Twitter.
Fellow bloggers: join me at Bloggy Law, where you’ll find Simple Tips for Bulletproofing Your Brand and Blog and I’ll help you navigate the social media legal landscape a little more smoothly.
Chrissy – who has written 426 posts on The Outlaw Mom® Blog - Creative Living in a Conventional World.


[…] are all about being together with family and eating a homemade cake that I’ve decorated to a theme they’ve requested. My mother always made us special cakes when we were growing up and I love […]
[…] treasure chest cake! Chrissy of The Outlaw Mom designed and made it for her son Sam’s first birthday party. The lid is a little slice of cake engineering genius – it’s made from curved cardboard […]
[…] this were the last party I planned (Sam’s pirate themed first birthday party), I would have gone what can only be described as worst-case bridezilla and had a meltdown. This […]
[…] featured some monster-themed gift ideas, some of you asked what themed gifts Sam received for his pirate-themed birthday party, so here you […]
I absolutely *love* the pirate ship! So cool. The cake is pretty amazing as well. So excited to share.
Thanks, Zina! Now what to do for this year’s birthday
[…] Themed Birthday Party - Tip Junkie Party Ideas{Celebrate} Pirate Themed Birthday Party .vvqbox { display: block; max-width: 100%; visibility: visible !important; margin: 10px auto; } […]
[…] decided to glue some leftover gems from Sam’s Pirate Themed Birthday Party onto the paper […]
[…] = 'none'; document.getElementById('singlemouse').style.display = ''; } {Celebrate} Pirate Themed Birthday Party .vvqbox { display: block; max-width: 100%; visibility: visible !important; margin: 10px auto; } […]
[…] Initially, I thought we could paint the cardboard in the recycling bin and maybe turn it into a house or other structure like when she helped paint Sam’s cardboard pirate ship. […]
[…] by this, the first thing I did to prepare for Sam’s pirate themed birthday party was to decide on the cake. After debating a pirate ship, a pirate face or a message in a bottle […]
[…] know me is to know I can’t resist a good theme! I fell head over heels with all the pirate-themed birthday gifts Sam received at his first birthday party, so when we were invited to a monster-themed […]
This is a party that big kids would love too. (see my mad tea party post)
I am going to save this for our autumn party. Great ideas.
I’m sure! I’ve seen really great pirate ships built from Mr. McGroovy’s plans for proms that are simply amazing. Great photo backdrop idea. Good luck with your pirate party
[…] our pirate party was featured five times (here, here, here, here and here), I joked that I would quit my day job to […]
Thanks for sharing your fun and yummy recipe with us at Cast Party Wednesday. I hope you come back and visit us tomorrow.
Thanks again.
I hope to see you there!
I’ll be back! Been too busy to bake, but will be sure to link up at the next Cast Party! Thanks for stopping by
P.S. I’m heading over to give you my vote at Lamb Around!
You’re so nice Thanks!
Thank you so much for linking up to “A Little Birdie Told Me…” at Rook No. 17 last week! I apologize for the belated visit…this week has been a real beast disguised in fondant and frosting.
I was so thrilled to have you link up this wonderful party so full of creative details. I’m in awe of that ship, and love that you added the chalkboard contact paper. The Swedish fish in jello is such a fabulous idea, and it gave me a good giggle to read that prolonged exposure to the jello will turn the fish into “whales”.
I do hope you’ll come by and share your creativity and talent regularly!
Best,
Jenn
Hi Jenn! Thanks so much for stopping by and the sweet comments My jaw just dropped as I took a look at your Cake Art! My goodness, your cakes are A-MAZING. I will definitely be stopping by often to check out your latest creations and check in to your link party (well, when I have actually done something creative to link up!).
How fun!!!!!!!! Love it
Thanks! Your little guy’s first birthday looked absolutely incredible with all of those great colors! Thanks for stopping by
I came here to check out your blog after you kindly left a nice comment on mine, and was inspired to browse around. This post here is great fun. What a wonderful ship you’ve made! Love it!!!
Do come link it up with us at our linky party here:
http://www.finecraftguild.com/you-linky-party/
Stay in touch!,
R.
Thanks for stopping by! I just linked up to one of your parties - think I hit the right one. I love your site: so many ideas for great inspiration! Thanks for stopping by
Wow, you did a fantastic job! What fun!
Thanks! We had great fun making everything. Love all your fabulous parties and party ideas on your blog - thanks for stopping by
AMAZING! I can’t wait to see the 2nd birthday party!
Thanks, Karen! We had a lot of fun making everything.
Glad to have found your blog - now that my daughter is older we are always looking for new ideas for learning while playing
That’s incredible! I love the cake, so creative.
http://carabossesbedchamber.blogspot.com/2011/06/hoos-got-talent.html
Thanks! It was difficult to get my mind off a pretty and pristine cake and turn it into a weathered, washed up looking cake, but I think I prefer it this way.
Thanks for stopping by
I dread taking my kids to birthday parties to be honest but this looks like a good time!
I saw you on My Girlish Whims and wanted to invite you to my new link party. Last week we had over 300 links, it was so much fun. It will run every Friday evening through Sunday. Hope to see you there. You can find the party button now on the blog if you want it for a reminder. http://www.bacontimewiththehungryhypo.blgospot.com/
I am even going to have a special give away just for linkers this week.
Hi Mindie! Thanks for stopping by and for cluing me in to your link party I will come by this weekend.
Btw, your little piggy on your button is so outrageously funny and scary at the same time: love it!
What a fun party Outlaw Mom! I love the cake. The fruit salad in hollowed out watermelons is also very cute. What a blast 😀
Visiting from Sugar Bee crafts. Have a great week!
Oh my goodness, I’m laughing out loud at your tagline! I love the name of your blog and the definition
Thanks for visiting and I’m glad I found your blog through your comment!
Thanks for the comments on our owl party. Your party looks like it was a huge success. LOVE the boat! Wow!!! Everything looks so cute and what a great little helper you had!
Thanks! We did have so much fun putting everything together and the best thing is we can set up the ship again (well, if we ever get around to it). I might have to plan an owl party for my daughter’s “half-birthday” since there are no more birthdays in our family until late fall! At the very least, I will have to make those cute little felt owls from your party.
Thanks for visiting
Great job - everything looked amazing! Thanks for sharing. I have 5 days until my pirate party and I hope to finish everything on my list!
Good luck with all the preparation for your party! We were so last minute with the ship because Hubby couldn’t get his head around the idea, but finally at 8:00 a.m. on the day of the party (guests arrived at 10:30!), he realized it was a really cool idea!
Thanks for visiting
[…] So a perfect idea for a recent rainy day was to break out my teeming stash of toilet paper and paper towel rolls to make some telescopes. These actually turned out to be great party accessories for Sam’s pirate birthday. […]