


{Bake} The Outlaw Mom(TM)’s Halloween Candy Corn Rice Krispies Treats and Cocoa Krispies Biscuits
October 12, 2011 in All Posts, Bake, Sponsored Posts

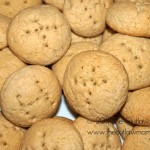
The Halloween fun never stops around here! We’ve done the pumpkin patch, made some fall cookies, picked out material for Halloween costumes, started decorating the house, and yesterday, we made some yummy Candy Corn Rice Krispies Treats and Candy Corn Cocoa Krispies “Biscuits.”
Not that Rice Krispies Treats need any extra flavor kick (or sugar, for that matter), but the warm candy corn adds a little extra jolt of candy flavor and a nice soft, chewy texture - kind of like biting into a white chocolate chip or a hard fudge.
Here’s how to make your own fun Halloween treats:
Ingredients

- Rice Krispies cereal (at least 6 cups)
- Cocoa Krispies cereal (at least 6 cups)
- 3 tablespoons of butter for each batch
- 4 cups of mini-marshmallows for each batch
- 1-2 cups of candy corn
A few ingredients tips:
Rice Krispies Treats have been around for ages and are not exactly gourmet desserts, but I am picky about my ingredients.
- I only use name brand marshmallows. There is a difference.
- Use mini-marshmallows for easier, faster melting.
- Don’t rush the process with higher heat, you’ll burn - or worse, yet - boil the marshmallow/butter mixture and trust me, your treats will not taste as good.
- People often ask whether I have a preferred brand of butter: I favor Kerrygold. Why? It’s real butter.
Recipes


 A few coloring tips:


- Mix a brighter color than you want the treats to end up. It might look too intense before you mix in the Rice Krispies cereal, but the color will soften.
- Use a gel color (I like Wilton’s) instead of liquid drops for more intense color that you can control. Just the smallest smidgen makes a huge difference that you can see right away when you’re creating your colors.

For the Cocoa Krispies “Biscuits,” just follow Step 1 (and 2 if you’re using regular Rice Krispies and coloring it brown or another color) and go on to Step 3 below.
 While the mixture is still warm, fill a biscuit cutter to shape your treats . . .
 . . . and you’re finished!


 Don’t forget to include your little one in the fun!
Jane loved using the cookie cutters and then resorted to cutting up little pieces with her scissors. Sam - of course - just went around eating all of the scraps!

 Happy Baking!
For more Rice Krispies fun, check out our other recipes:
To check out my shop for ingredients, go to my Walgreen’s Halloween Bake Shop Google+ album here.
Disclaimer: This project has been compensated as part of a social shopper insights study for #collectivebias. This does not mean that I was told what to write by the sponsor(s) nor does it mean that the sponsor(s) wrote this post and I merely copied it onto my blog. The content of this post was created entirely by me and consists solely of my own unbiased opinions and/or thoughts, but I’m sure you could already tell!
![]()
Parents and friends: for more ideas, activities, and inspiration for #RaisingThinkingKids, click on an icon below to join us on Facebook, Pinterest, Google+ and Twitter.
Fellow bloggers: join me at Bloggy Law, where you’ll find Simple Tips for Bulletproofing Your Brand and Blog and I’ll help you navigate the social media legal landscape a little more smoothly.
Chrissy – who has written 422 posts on The Outlaw Mom® Blog - Creative Living in a Conventional World.


yummy. We did the candy corn and peanut butter m&ms in our last yr and they came out great! Love the one you have here!! Jaime@FSPDT
[…] then my mind turned to homemade caramel apple popcorn after shopping for the ingredients to make these Halloween goodies and spying Orville’s caramel apple-flavored Poppycock. I bought the ingredients to invent […]
[…] I posted our baking experiment for this week already, I’ll send you into the weekend with some drool-worthy homemade Halloween […]
Your photos are gorgeous- I need to try these- My kids would just love them!
Thanks I’m working on the photography. Super fun, super easy - you have to try it!